
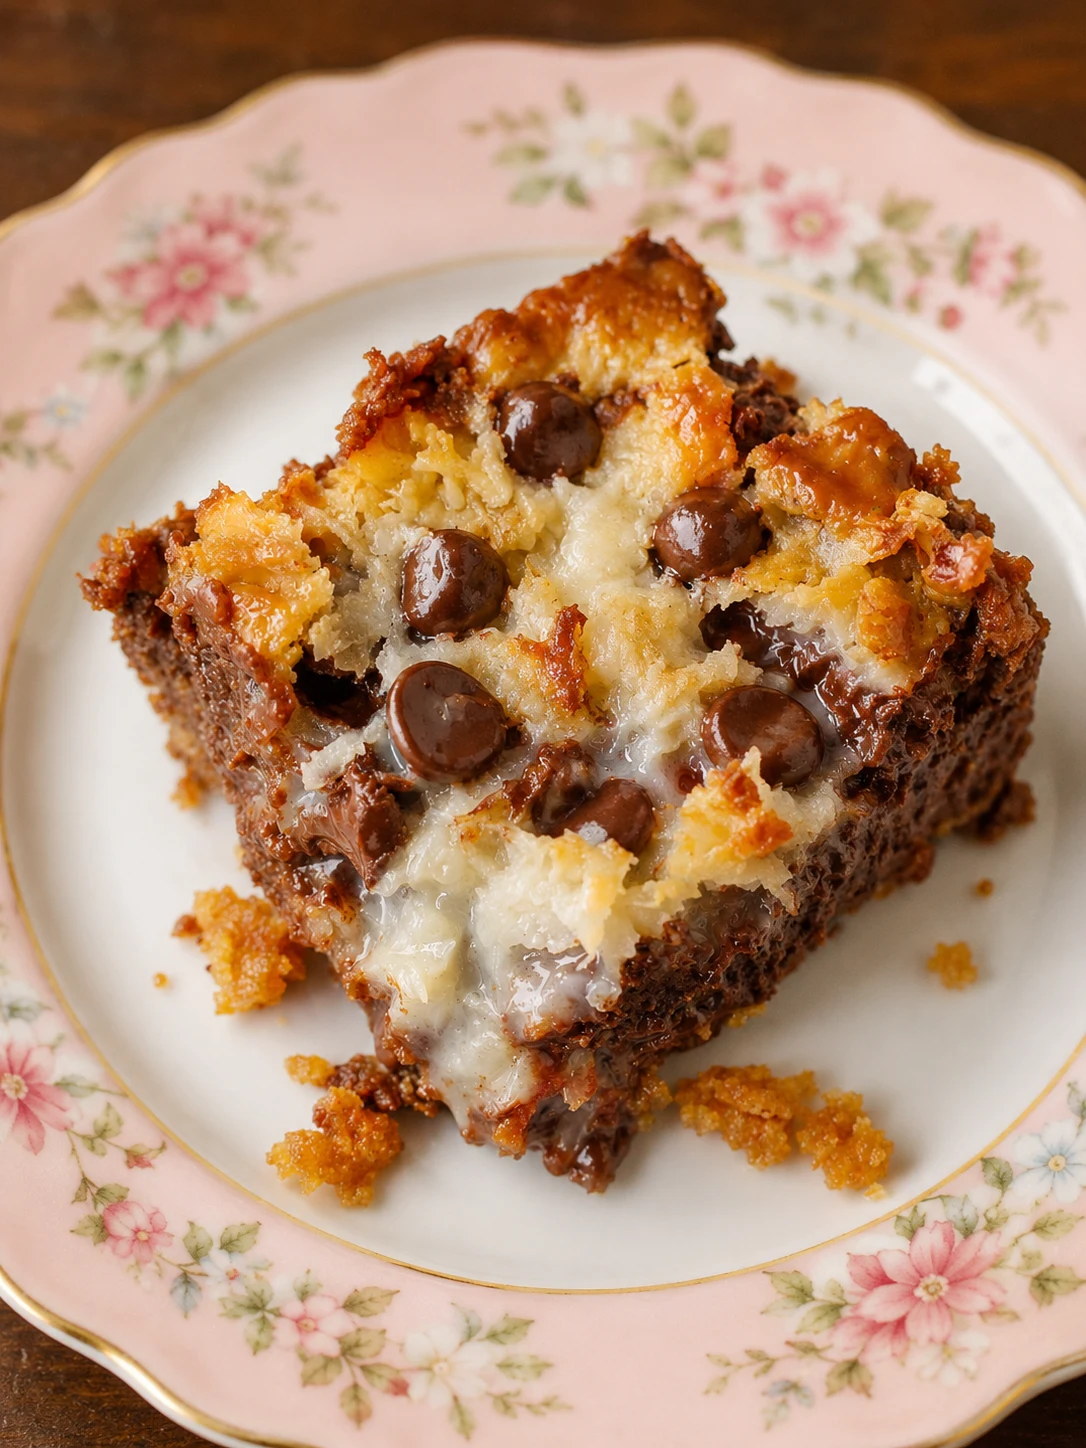
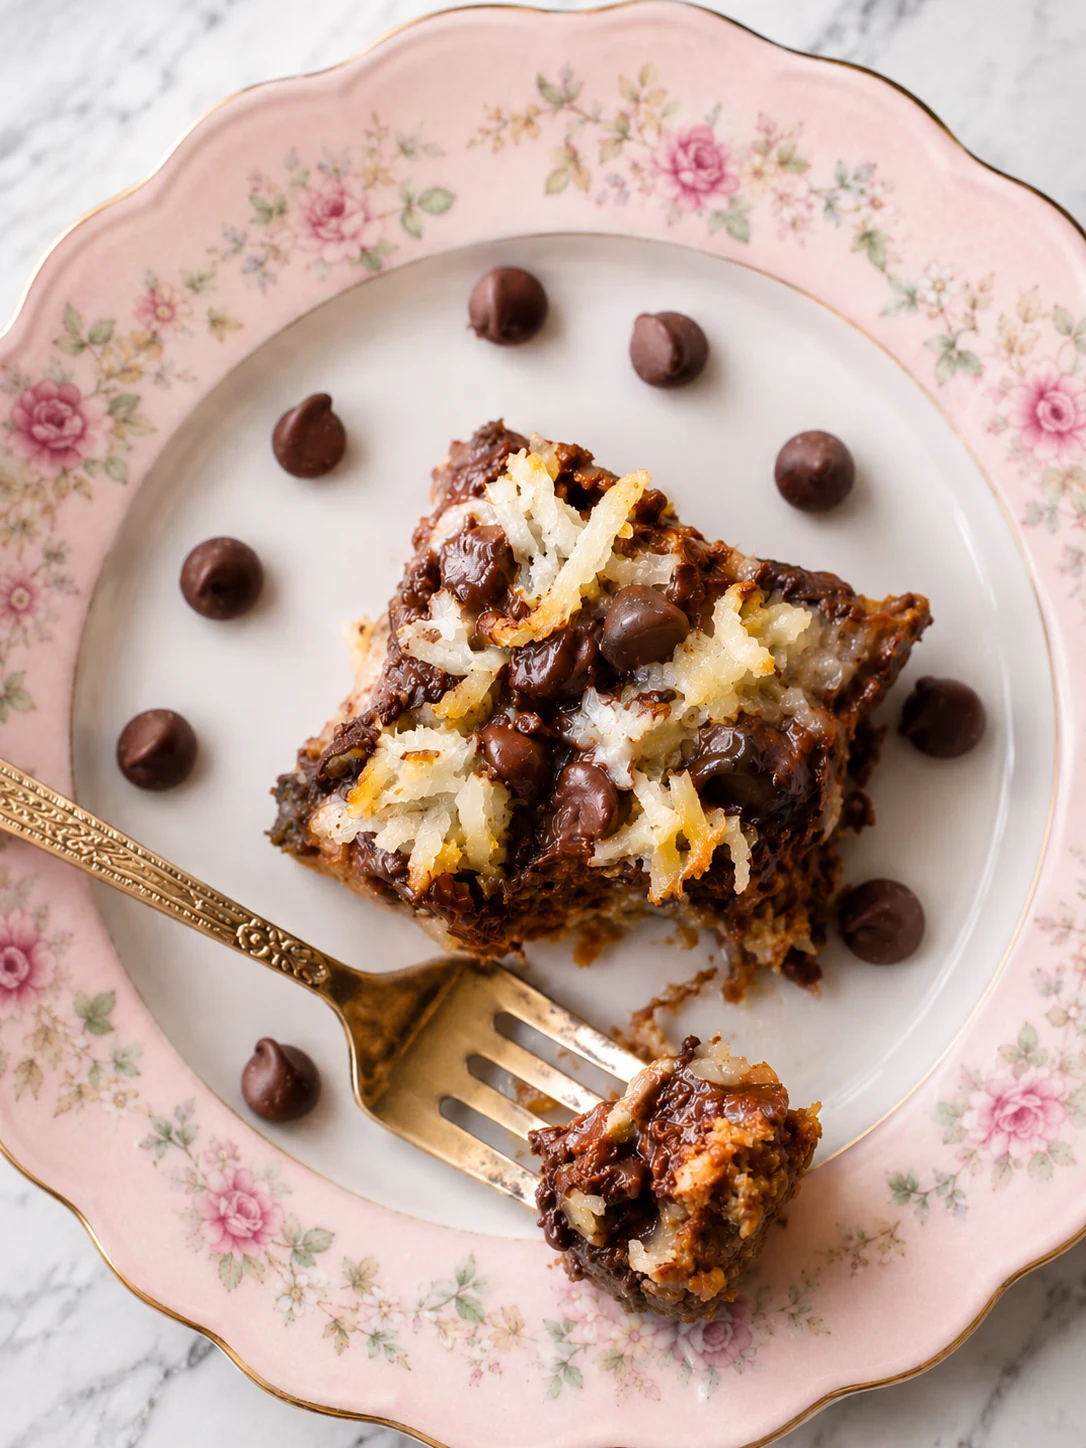
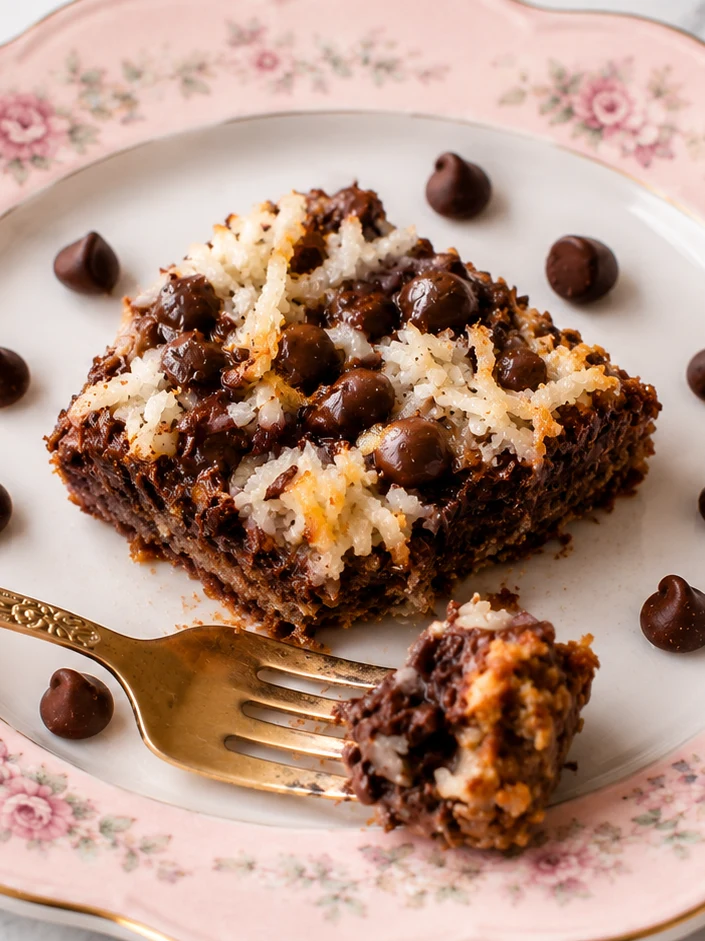
Coconut Magic Bars are layered dessert bars made with a buttery graham cracker crust, semi-sweet chocolate chips, sweet shredded coconut, crunchy pecans, and a pour of sweetened condensed milk that bakes into a golden, gooey, caramelized topping. They are done in 45 minutes and impossible to stop eating.
What makes these bars genuinely special is how little work they actually require. You press a simple crust into a pan, layer everything in, pour the condensed milk over the top, and the oven does the rest. Every layer bakes together into something chewy, rich, and deeply satisfying in a way that feels far more complicated than it is. If you love easy recipes built around sweetened condensed milk, my Condensed Milk Cookies use the same pantry staple and come together just as fast.
In This Post
Why You’ll Love These Coconut Magic Bars
- Only 7 ingredients. Butter, brown sugar, graham crackers, chocolate chips, coconut, pecans, and condensed milk. Everything is a pantry staple you likely already have on hand.
- About 10 minutes of hands-on work. You crush, mix, layer, and pour. The oven handles the transformation from there. There is no creaming, no chilling, and no piping.
- That texture is unforgettable. A firm, buttery base with a chewy, gooey top that has toasted coconut, melted chocolate, and crunchy pecans in every single bite. It is one of those textures that keeps you reaching for another bar.
- They feed a crowd. One 8×8 pan makes 12 to 16 bars depending on how you cut them. They travel well, hold at room temperature for days, and always disappear first at a potluck or holiday table.
- Completely customizable. The layering method works with almost any chocolate, nut, or chip combination. Once you understand the base formula, you can swap ingredients in and out and the bars always work.
- Freezer friendly. Cut and freeze individual bars for up to 3 months. Pull one out whenever you want a treat. They thaw quickly at room temperature and taste just as good as fresh.

table talk with liliya!
I first made these Coconut Magic Bars for a holiday cookie exchange years ago and brought them almost as an afterthought. Every other person there showed up with decorated sugar cookies and elaborate truffles. My bars looked simple by comparison. They were gone in under ten minutes. Someone actually pulled me aside to ask what was in them, clearly expecting a long list of steps. When I explained it was seven ingredients and a 30-minute bake, she looked almost offended. That reaction is the best way I can describe what these bars do every single time you bring them somewhere. They look modest, they taste extraordinary, and they take almost no effort at all. I have made them with white chocolate, with walnuts, with butterscotch chips. The original version is still my favorite.
Ingredients You’ll Need
This recipe makes one 8×8 pan, about 12 to 16 bars. Here is what each ingredient does and why it matters.
- Unsalted butter (½ cup). The butter melts directly in the baking pan and acts as the base for the crust. Using unsalted lets you control the salt level. The fat from the butter coats the graham cracker crumbs and binds everything together as it bakes. Do not substitute margarine or oil.
- Light brown sugar (¼ cup, packed). Mixed into the graham cracker crumbs before pressing, the brown sugar adds a warm caramel depth to the base and helps the crust stay slightly chewy rather than crumbly. Pack it firmly when measuring so you get the full quarter cup.
- Graham cracker crumbs (2 cups, about 15 to 16 full sheets). These form the classic crust. You can crush whole graham crackers in a zip-top bag or buy pre-made crumbs. Either works. The crumbs should be fine and even, with no large chunks, so the crust presses into a uniform layer.
- Semi-sweet chocolate chips (1 cup). The first topping layer. Semi-sweet is the classic choice because it balances the sweetness of the coconut and condensed milk without tipping into cloying territory. Milk chocolate makes these sweeter overall. Dark chocolate gives a slightly bitter, grown-up contrast.
- Shredded sweetened coconut (1 cup). This is the defining ingredient. Sweetened coconut has a softer texture and a more pronounced flavor than unsweetened. It toasts during baking and gives the top of the bars that golden, slightly crispy finish. Make sure you are using sweetened, not desiccated unsweetened coconut, as the texture and flavor are completely different.
- Pecans, coarsely chopped (¾ cup). Pecans add a buttery crunch that anchors the sweet layers and gives each bar some structure. Coarse chopping keeps the pieces large enough to notice in every bite. Walnuts are a good substitute if that is what you have.
- Sweetened condensed milk (1⅔ cups). This is the magic in these magic bars. As it bakes, the condensed milk seeps down through every layer, binds everything together, and caramelizes into a sticky, golden glue. Use full-fat sweetened condensed milk. Do not substitute evaporated milk. They are completely different products and evaporated milk will not set properly.
Equipment Needed
- 8×8 baking pan. The recipe is sized for an 8×8. A 9×9 pan will work but produces thinner bars with a shorter bake time. A 9×13 will produce very thin bars and will need less baking time.
- Parchment paper. Not strictly required but strongly recommended. Lining the pan with parchment and leaving an overhang on two sides lets you lift the whole slab out cleanly and cut it on a board. Without parchment, cutting in the pan can damage the crust.
- Large mixing bowl and fork. For combining the graham cracker crumbs with the brown sugar before pressing into the pan.
- Measuring cups and spoons. Accuracy matters for the condensed milk and butter quantities in particular. Too much butter makes the crust greasy. Too little condensed milk and the layers do not bind properly.
How I Make Coconut Magic Bars
This is a quick overview of how I make Coconut Magic Bars, with tips along the way. You’ll find the full ingredients and instructions in the recipe card below.
- Preheat your oven to 350°F. Give it a full 10 to 15 minutes to come to temperature before the pan goes in. An underheated oven affects how evenly the bars bake and how the condensed milk caramelizes.
- Mix the crust. In a bowl, stir the graham cracker crumbs and packed brown sugar together until evenly combined. The sugar should be distributed throughout, with no clumps.
- Melt the butter directly in the pan. Place the ½ cup of butter into your 8×8 baking pan and set it in the preheating oven for 3 to 5 minutes, just until completely melted. Watch it so it does not brown. This is one less bowl to wash and the warm butter helps the crust press together cleanly.
- Press the crust over the butter. Remove the pan from the oven and spread the graham cracker and brown sugar mixture evenly over the melted butter. Press it gently with a fork or the bottom of a flat measuring cup into an even layer. Do not pack it so hard that it becomes a compressed brick. You want it firm but still with a little give.
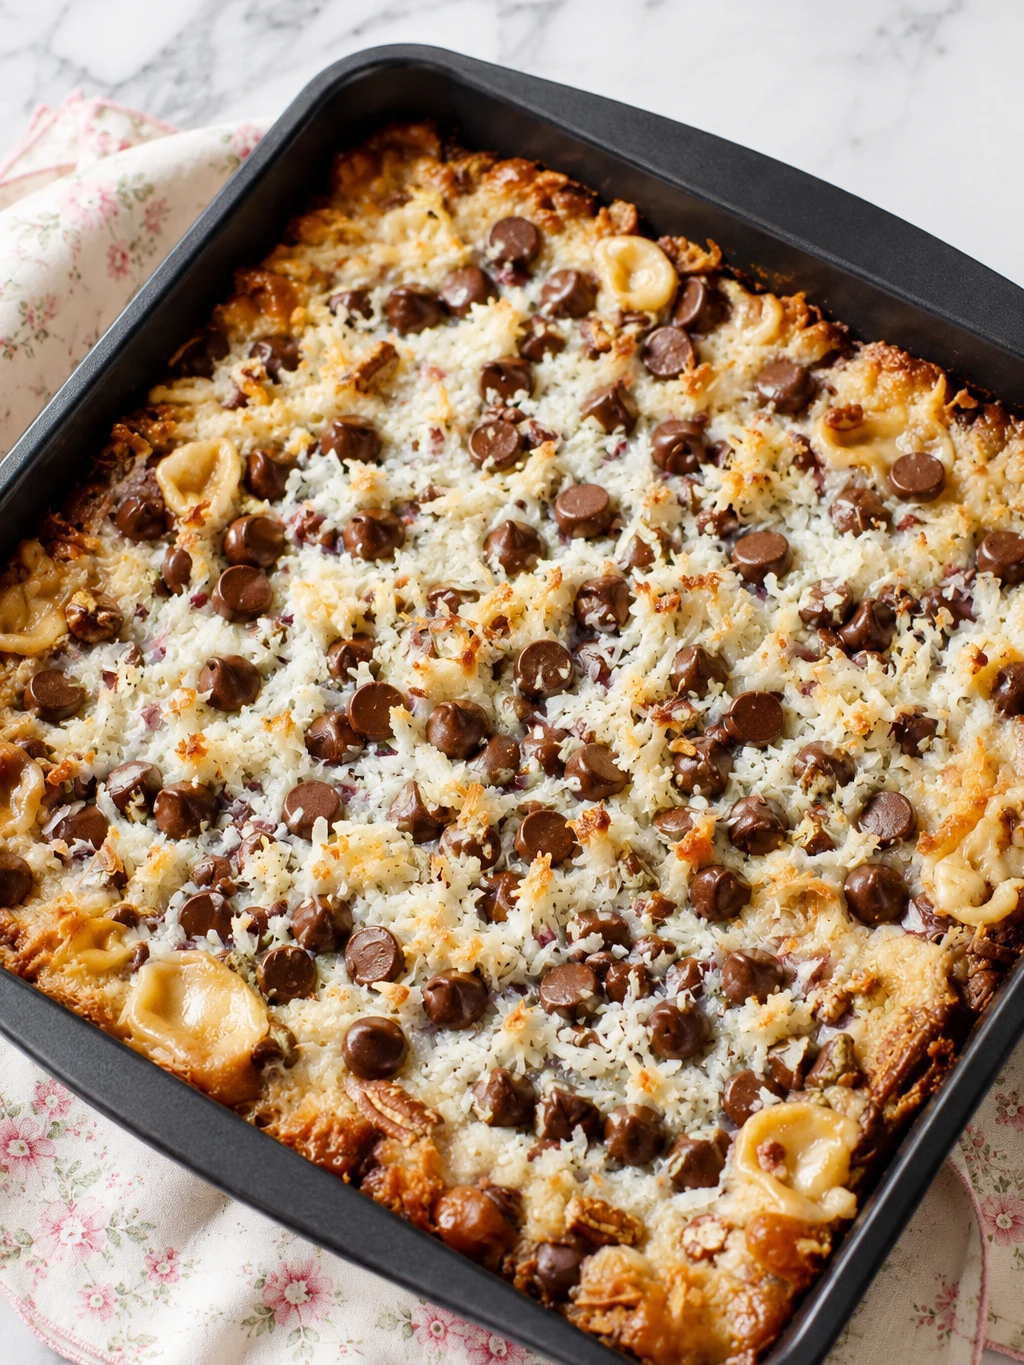
- Add the layers. Scatter the chocolate chips evenly over the crust. Then add the shredded coconut in an even layer on top of the chips. Then scatter the chopped pecans over the coconut. Each layer should cover the surface as evenly as you can manage.
- Pour the condensed milk over everything. Open your can of sweetened condensed milk and pour it evenly across the entire surface of the pan. Try to cover every area. The milk will spread and settle as it bakes, but starting with an even pour helps. Resist the urge to stir or press anything down.
- Bake for 30 minutes. The bars are done when the coconut on top is lightly golden and the edges look set and slightly pulled away from the pan. The center may still look a little soft when you take them out. That is normal. It sets as the bars cool.
- Cool completely before cutting. This step is non-negotiable. Set the pan on a wire rack and leave it alone for at least 1 hour at room temperature, or 30 minutes in the refrigerator. Warm coconut magic bars are delicious but completely unsliceable. They need time to firm up and set before a knife goes near them.
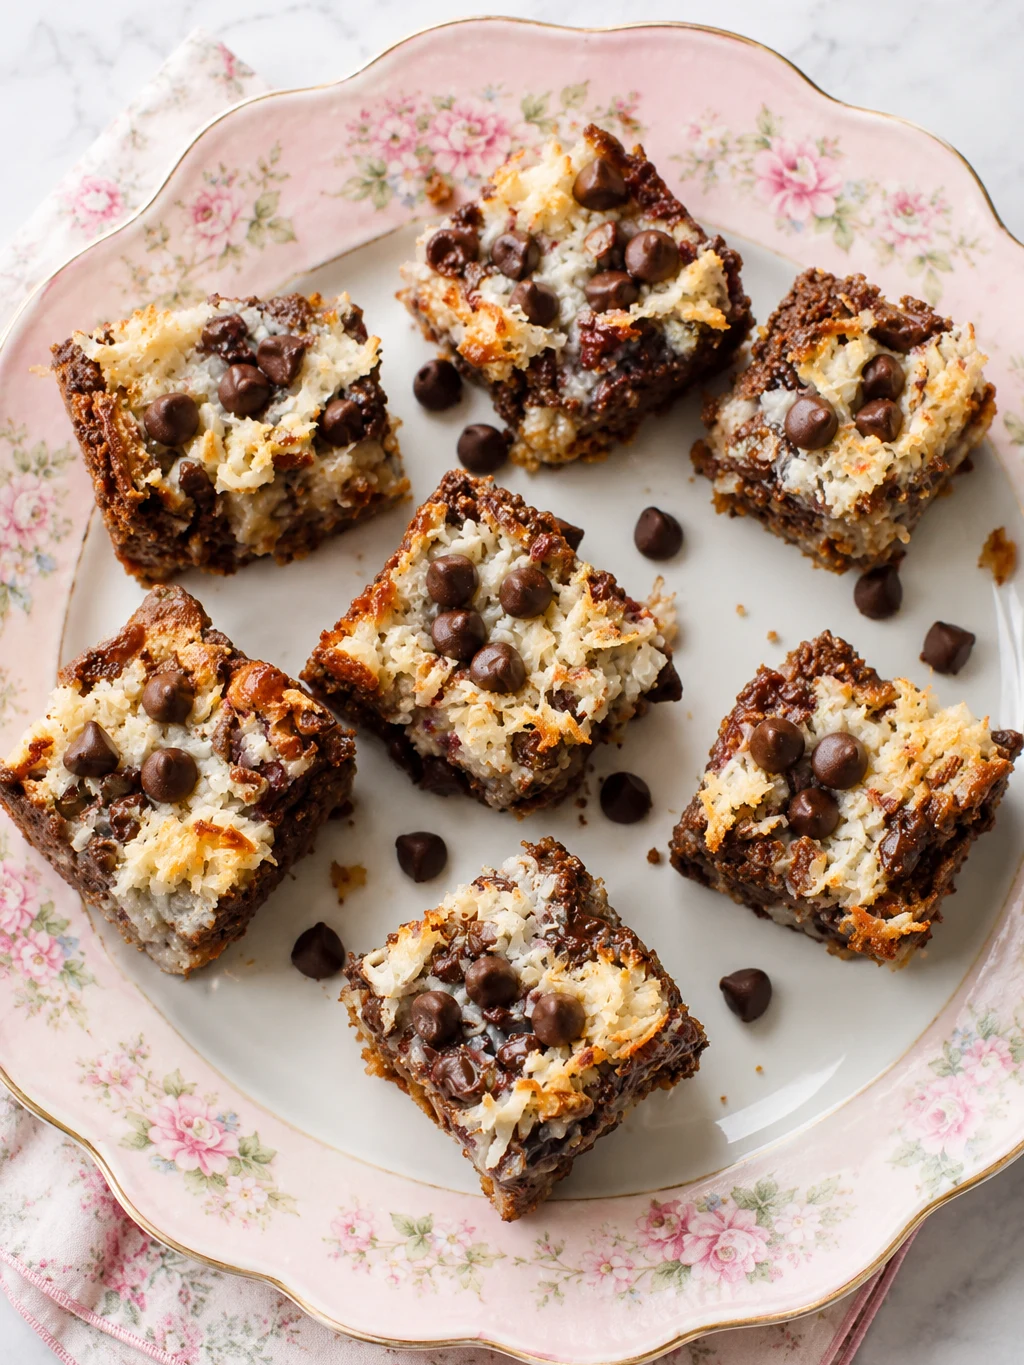
- Lift out and slice. Use the parchment overhang to lift the whole slab onto a cutting board. Use a sharp knife and cut in a single smooth downward motion rather than sawing, which tears the layers. Wipe the blade between cuts for cleaner edges.
Expert Tips for the Best Coconut Magic Bars
- Cool completely before you cut them. I know this is listed in the instructions too, but it is worth saying twice. Cutting warm bars is the single most common reason people end up with a crumbled mess instead of clean slices. One hour at room temperature minimum. Thirty minutes in the fridge if you are in a rush.
- Use full-fat sweetened condensed milk. Low-fat versions have a higher water content and do not caramelize or set the same way. The full-fat version is what gives these bars their characteristic sticky, chewy, bound texture. It is not the place to cut calories.
- Line the pan with parchment. Leave about an inch of overhang on two opposite sides. When the bars are fully cooled, you can lift the whole slab out in one piece and cut on a board rather than digging into the pan. It makes a visible difference in how the bars look when sliced.
- Keep the layers flat and even. Uneven layers mean some bites are all chocolate and some are all pecan. Take an extra 30 seconds to spread each ingredient as evenly as you can across the surface before adding the next one.
- Watch the coconut at the 25-minute mark. Ovens vary. Start checking at 25 minutes. The coconut should be golden, not deep brown. Once the top toasts past golden it gets bitter quickly. Pull the pan the moment you see a light golden color across the surface.
- Chill before cutting for the cleanest slices. Room temperature bars cut well, but 20 minutes in the refrigerator before slicing gives you sharper, cleaner edges that hold their shape on a serving plate.
Common Mistakes to Avoid
- Cutting before the bars are fully cool. Warm condensed milk has not set yet. It is still liquid underneath the surface. If you cut into the bars before they are completely cooled, the layers slide apart and you end up with gooey chunks rather than sliceable bars. Give them the full hour.
- Using evaporated milk instead of sweetened condensed milk. These are two completely different products that look similar in the can. Evaporated milk is thin and unsweetened. It will not bind the layers or caramelize. The recipe requires sweetened condensed milk specifically.
- Packing the crust too hard. The crust should be pressed firmly enough to hold together, but not compacted so densely that it becomes a solid brick. Over-packing makes the base very hard once cooled and the bars become difficult to bite through cleanly.
- Uneven layer distribution. If the chocolate chips pile up in one corner and the coconut is thin on the sides, you get very different bites across the pan. Take an extra moment to spread each layer evenly before adding the next one.
- Overbaking. Thirty minutes is the guide, but the real signal is the coconut color. Once the coconut toasts past a light golden, it goes bitter quickly. Start checking at 25 minutes and pull the pan as soon as you see that golden color, not dark brown.
- Skipping the parchment paper. You technically can bake these without parchment, but removing them from the pan is a challenge. The condensed milk bakes onto the sides and corners and the bars can break when you try to get them out. A simple parchment lining prevents all of that.
Coconut Magic Bars Variations
The layering method in these coconut magic bars is one of the most flexible techniques in bar baking. Once you have the base formula down, the variations are almost endless.
- White chocolate chips. Swap the semi-sweet chocolate chips for white chocolate and you get a completely different flavor profile. White chocolate with coconut and pecans leans more tropical and sweet. Pair with macadamia nuts instead of pecans for a Hawaiian-style version.
- Butterscotch chips. Add ½ cup of butterscotch chips alongside or instead of the chocolate chips. The butterscotch and condensed milk combination creates a deep, toffee-forward flavor that is a popular variation on the classic recipe.
- Walnuts instead of pecans. Walnuts have a slightly more bitter, earthier flavor than pecans and hold up just as well during baking. Use the same quantity and chop them to roughly the same size.
- Toasted coconut. Toast the shredded coconut in a dry skillet for 3 to 4 minutes before layering. This gives the bars a deeper, nuttier coconut flavor from the start, and the toasted color is more consistent since it is already done before baking.
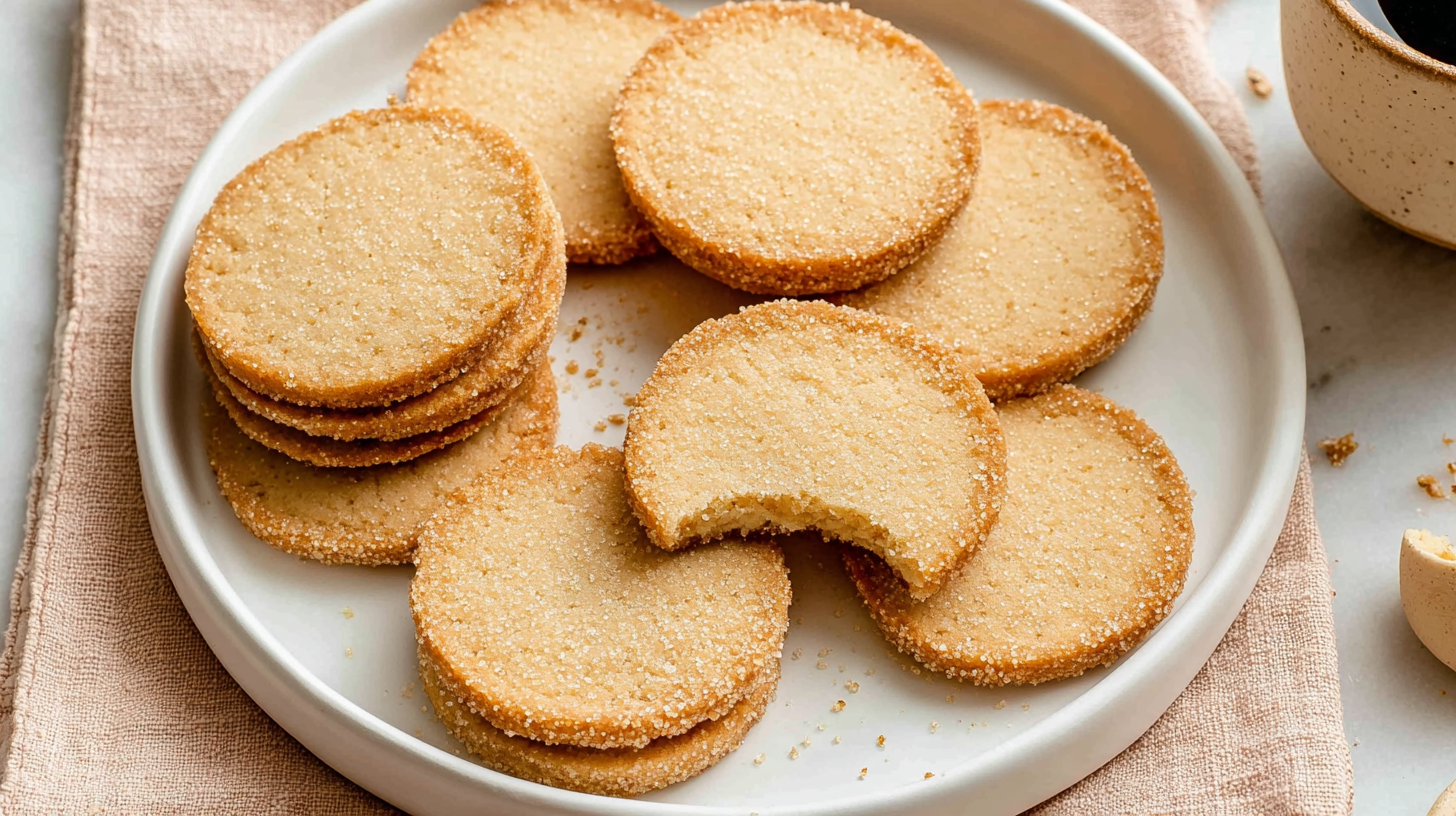
- Dark chocolate for a less sweet version. If you find the bars too sweet overall, switching to 70% dark chocolate chips cuts the sugar level noticeably and gives a more sophisticated flavor that works especially well for adults. The No Bake Coconut Cream Balls use a similar dark chocolate and coconut combination if you want another recipe in that direction.
- Mini version in a muffin tin. Press the crust into greased muffin tin cups, add small amounts of each layer, and pour a teaspoon of condensed milk over each one. Bake at 350°F for 20 to 22 minutes. These are perfect for a cookie tray or a gathering where individual portions are easier to serve.
What to Serve With Coconut Magic Bars
These bars are rich enough to stand on their own, but a few pairings make them even better. A scoop of Homemade Vanilla Ice Cream next to two warm bars is one of the simplest and most satisfying dessert plates you can put together. The cold, plain vanilla cuts through the sweetness of the coconut layer and makes every bite feel more balanced. For a holiday cookie tray, coconut magic bars sit naturally alongside shortbread, pecan bites, and fudge. The layered look and golden coconut top make them one of the most visually distinctive pieces on the platter. They also pair well with a strong black coffee or an espresso, where the bitterness provides contrast to the sweetness of the condensed milk and chocolate. At a casual gathering, cut them into smaller pieces and let people graze. They hold at room temperature for hours and do not need to be refrigerated to stay good.
Storing and Freezing
Room temperature. Store cut bars in an airtight container at room temperature for up to 3 days. Layer them with parchment paper between rows to prevent sticking. The bars hold their shape well and the texture stays chewy and satisfying.
Refrigerator. For longer storage, keep the bars in an airtight container in the fridge for up to 1 week. Cold bars are firmer and a little denser, with a more pronounced chew. Some people prefer them straight from the fridge. Let them sit at room temperature for 10 minutes before serving if you prefer a softer texture.
Freezer. Coconut magic bars freeze very well for up to 3 months. Wrap individual bars in plastic wrap, then place them in a zip-top freezer bag with the air squeezed out. Thaw at room temperature for 20 to 30 minutes. The texture after thawing is essentially identical to fresh.
Make ahead. These bars are an excellent make-ahead recipe. Bake the full batch up to 3 days before you need them, store at room temperature or in the fridge, and slice the day you plan to serve. The flavor actually deepens slightly after a day, making them taste even better on day two than day one.
FAQs About Coconut Magic Bars
What are coconut magic bars?
Coconut magic bars are layered dessert bars made with a buttery graham cracker crust topped with chocolate chips, shredded sweetened coconut, chopped pecans, and sweetened condensed milk. The condensed milk bakes into the layers and caramelizes into a sticky, golden binding layer. They are also known as magic cookie bars, hello dolly bars, and seven layer bars.
Why are they called magic bars?
The name comes from how the condensed milk works during baking. You pour it over loose, separate layers of ingredients and by the time the bars come out of the oven, everything has merged into one cohesive, caramelized slab. The transformation feels almost like magic because no mixing or binding step is required. The oven does all the work.
Can I make coconut magic bars without pecans?
Yes. The pecans can be left out entirely or swapped for walnuts, macadamia nuts, almonds, or sunflower seeds for a nut-free option. The bars will be slightly less textured without the nuts but will still hold together properly and taste great. If you omit the nuts, consider adding an extra layer of chips or coconut to fill the pan evenly.
Can I use unsweetened coconut instead of sweetened?
You can, but the result will be noticeably less sweet and the texture will be drier since unsweetened coconut has less moisture. If you use unsweetened coconut, consider adding an extra tablespoon of brown sugar to the crust to compensate for the reduced sweetness in the topping layer. The bars will still work, they will just have a less traditional magic bar flavor.
How do I know when coconut magic bars are done baking?
The bars are done when the shredded coconut on top is lightly golden and the edges look set. The center may still look slightly soft when you pull the pan out of the oven. That is normal. The center firms up as the bars cool. If the coconut is already golden at 25 minutes, pull them out. Do not wait for the center to look completely set in the oven or the coconut will overbake.
Can I make coconut magic bars ahead of time?
Yes. These bars are an excellent make-ahead recipe. Bake them up to 3 days in advance, store in an airtight container at room temperature or in the refrigerator, and cut them the day you plan to serve. The flavor improves slightly after a day as the layers settle and meld together.
Why are my magic bars too soft and gooey after cooling?
There are two likely causes. The first is that the bars did not cool long enough before cutting. They need a full hour at room temperature to set properly. The second cause is too much condensed milk. Measure carefully and do not exceed the recipe amount. Extra condensed milk creates a filling that never fully firms up. Refrigerating the bars for 20 minutes after cooling helps accelerate the setting process.
Can I double the recipe?
Yes. Double all ingredients and use a 9×13 baking pan. The bake time stays approximately the same at 30 minutes, though you may need an extra 3 to 5 minutes since the larger pan takes longer to heat through evenly. Watch the coconut color and pull when it is lightly golden. A 9×13 pan yields approximately 24 to 30 bars.
Before you get started! If you make these Coconut Magic Bars, please leave a rating and review below the recipe card. It helps more readers find this recipe and keeps the site going.
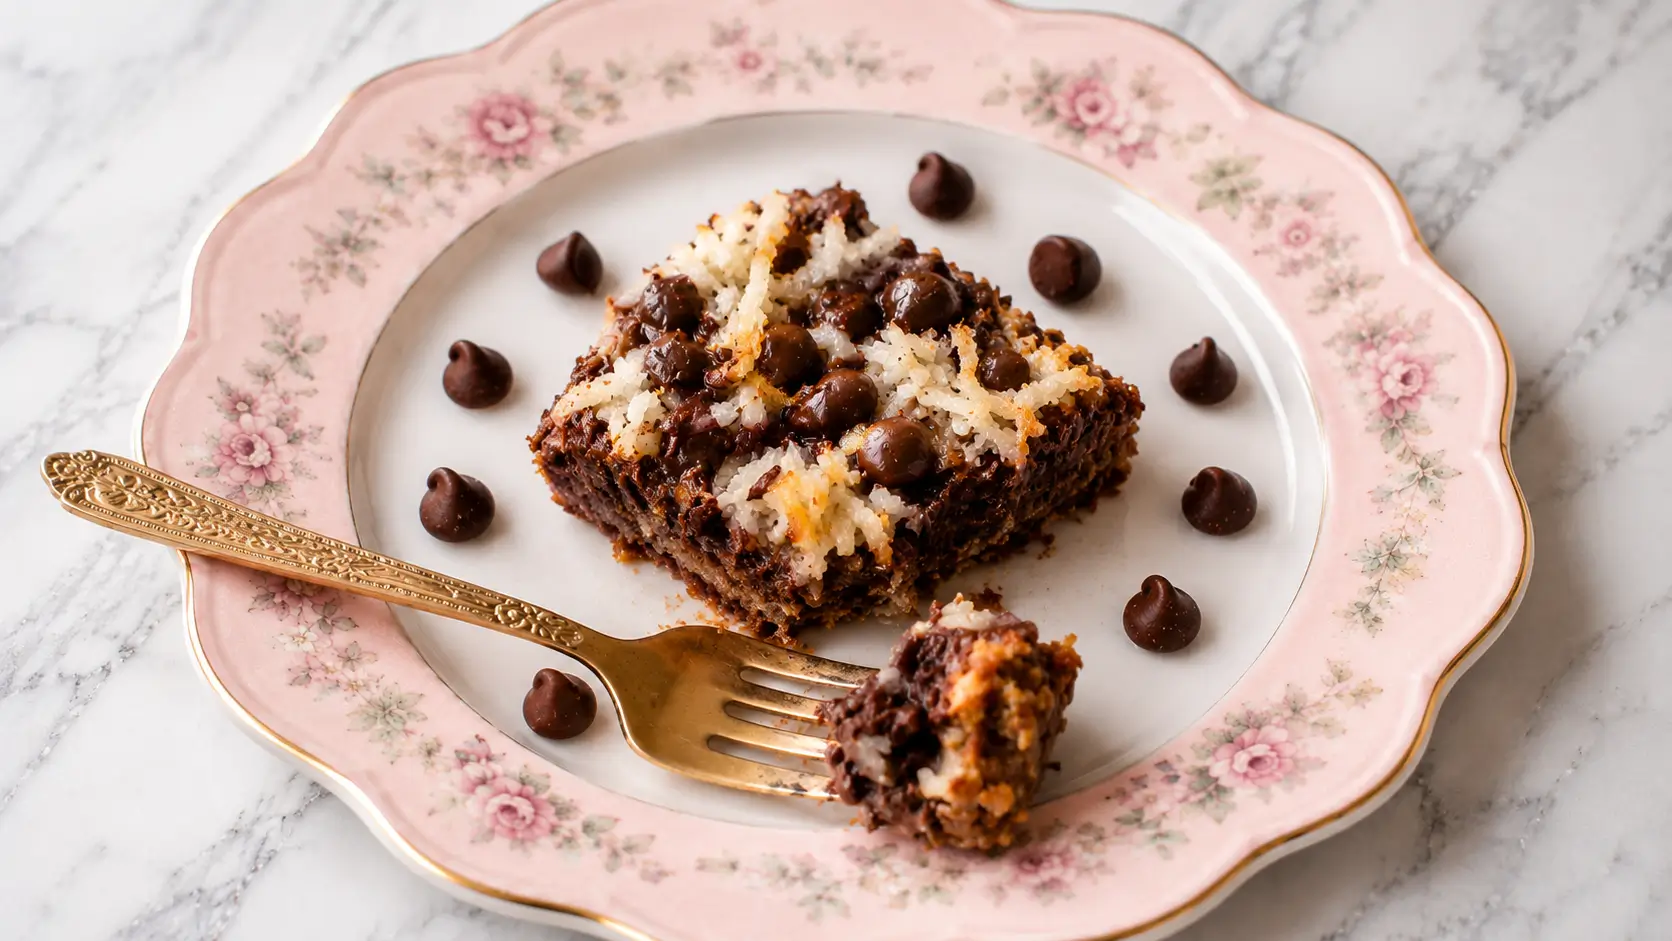
Best Coconut Magic Bars Recipe (Gooey, Golden + Ready in 45 Minutes)
- Total Time40 minutes
- Yield16 bars 1x
- DietVegetarian
Layered dessert bars with a buttery graham cracker crust, chocolate chips, sweet shredded coconut, crunchy pecans, and sweetened condensed milk that caramelizes into a golden gooey topping.
Ingredients
- ½ cup unsalted butter
- ¼ cup light brown sugar packed
- 2 cups graham cracker crumbs (approximately 15 to 16 full sheets)
- 1 cup semi-sweet chocolate chips
- 1 cup shredded sweetened coconut
- ¾ cup pecans coarsely chopped
- 1 ⅔ cups sweetened condensed milk
Instructions
- Preheat oven to 350°F.
- Crush the graham crackers. Stir the brown sugar into the graham crackers and set aside.
- Put the butter into an 8×8 baking pan and heat in the oven until completely melted.
- Remove from the oven and evenly spread the graham cracker mixture over the melted butter.
- Layer the chocolate chips, then the coconut, then the pecans evenly across the top.
- Evenly pour the sweetened condensed milk over everything.
- Bake for 30 minutes or until the coconut is lightly browned.
- Cool completely before cutting into bars.
- Prep Time: 10 minutes
- Cook Time: 30 minutes
- Category: Dessert
- Method: Baking
- Cuisine: American
Nutrition
- Serving Size: 1 bar
- Calories: 346 kcal
- Sugar: 33 g
- Sodium: 152 mg
- Fat: 18 g
- Saturated Fat: 9 g
- Unsaturated Fat: 9 g
- Trans Fat: 0 g
- Carbohydrates: 44 g
- Fiber: 2 g
- Protein: 5 g
- Cholesterol: 24 mg
More Recipes to Try
If you loved these bars, here are more easy dessert recipes from the Desserts collection worth bookmarking: