Chocolate Peanut Butter Dessert Cups recipe is pure magic in every spoonful. If you’re looking for a no-bake treat that layers creamy peanut butter mousse with crushed chocolate cookies and a drizzle of chocolate sauce, this is it. It’s easy, rich, and deeply satisfying everything you want in a make-ahead dessert that feels fancy but takes less than 30 minutes to pull together.
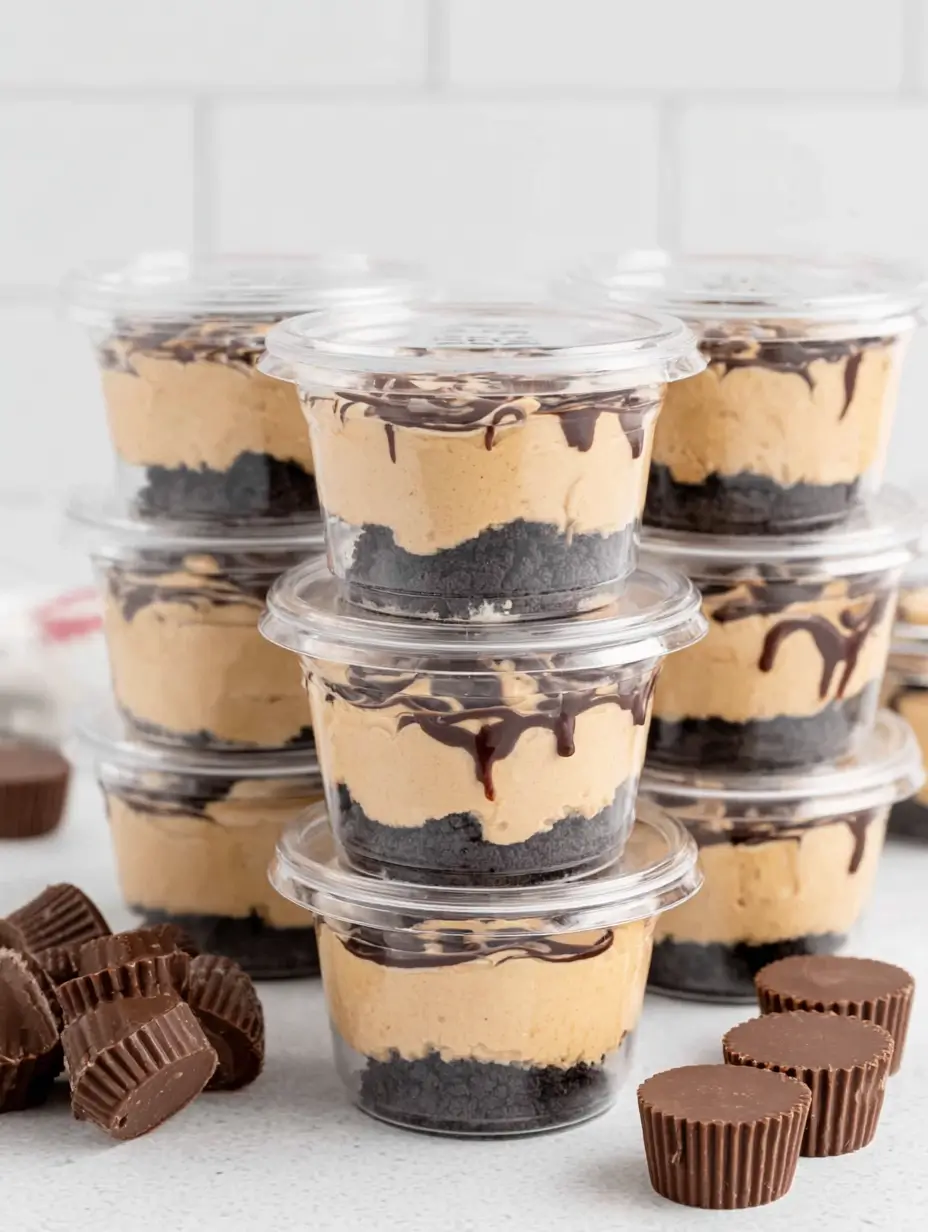
They’re creamy, decadent, and layered with that dreamy combo of peanut butter and chocolate plus, they’re so easy to prep ahead. You can make them the night before, pop them in the fridge, and they’re ready to go. If you love no-bake layers like this, you’ve got to check out my Chantilly Lili dessert, or the stunning Strawberry Dubai chocolate cups they’re every bit as easy and satisfying.
In This Post
Why You’ll Love These Chocolate Peanut Butter Dessert Cups
- No baking required. These are ideal for hot weather days or quick prep situations—just mix, layer, and chill.
- Fast and fuss-free. You can pull them together in under 30 minutes, making them perfect for last-minute gatherings or weeknight cravings.
- Kid- and crowd-approved. Whether you’re feeding kids or grown-ups, this combo of creamy peanut butter and chocolate wins everyone over.
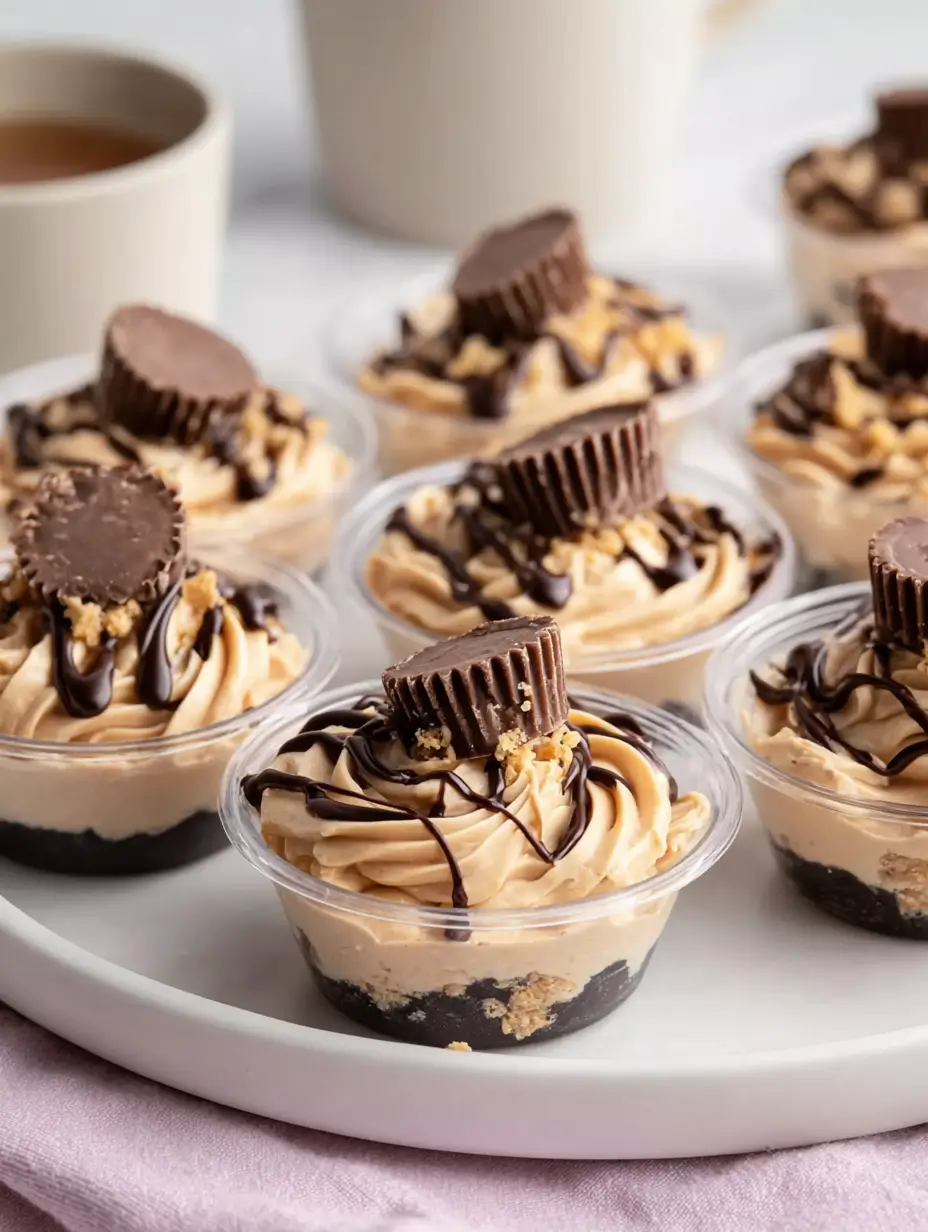
- Visually stunning. With that piped swirl, glossy chocolate drizzle, and peanut butter cup topper, they look bakery-level fancy with almost zero effort.
- Prep-ahead dessert. These cups taste even better after a few hours in the fridge, so they’re a dream for make-ahead hosts.
- Perfect portion size. Each cup is a ready-to-go serving, which makes cleanup easy and eliminates dessert slicing or serving stress.
- Flexible for any occasion. Dress them up for holidays, parties, school functions, or just a cozy night in.
- Endlessly customizable. Swap in different crusts, fillings, and toppings to suit your mood or pantry.
- Naturally gluten-free option. Just use GF sandwich cookies for an easy gluten-free treat.

table talk
With Liliya!
Let’s be honest chocolate and peanut butter is a combo that never disappoints. The first time I made these for a back-to-school night, they were gone before the second round of announcements. There’s something about the chilled, fluffy peanut butter layer paired with that buttery chocolate cookie base that makes them utterly addictive. Now, they’re my go-to for any event where I need a make-ahead dessert that looks impressive and tastes even better.
Liliya
Ingredients Needed For Chocolate Peanut Butter Dessert Cups
- Crushed Oreo cookie crumbs. These make the perfect base layer. No need to remove the filling just pulse the whole cookie.
- Salted butter. Melted and cooled slightly, it binds the crumbs together into a rich, buttery crust.
- Cream cheese. Use full-fat cream cheese, softened to room temp, for the smoothest filling.
- Powdered sugar. Sweetens the peanut butter mousse without any grittiness.
- Creamy peanut butter. Go for a no-stir variety like Reese’s or Jif for best texture and stability.
- Cold, heavy whipping cream. Whips up thick and creamy, giving the filling its light, fluffy structure.
- Pure vanilla extract. Adds depth and balances the richness.
- Chocolate sauce. Optional, but that drizzle takes these over the top.
- Reese’s peanut butter minis. Cute, delicious, and the perfect garnish for a final flourish.
How I Make Chocolate Peanut Butter Dessert Cups
(This is a quick overview of how I make chocolate peanut butter dessert cups, with tips along the way. You’ll find the full ingredients & instructions in the recipe card below.)
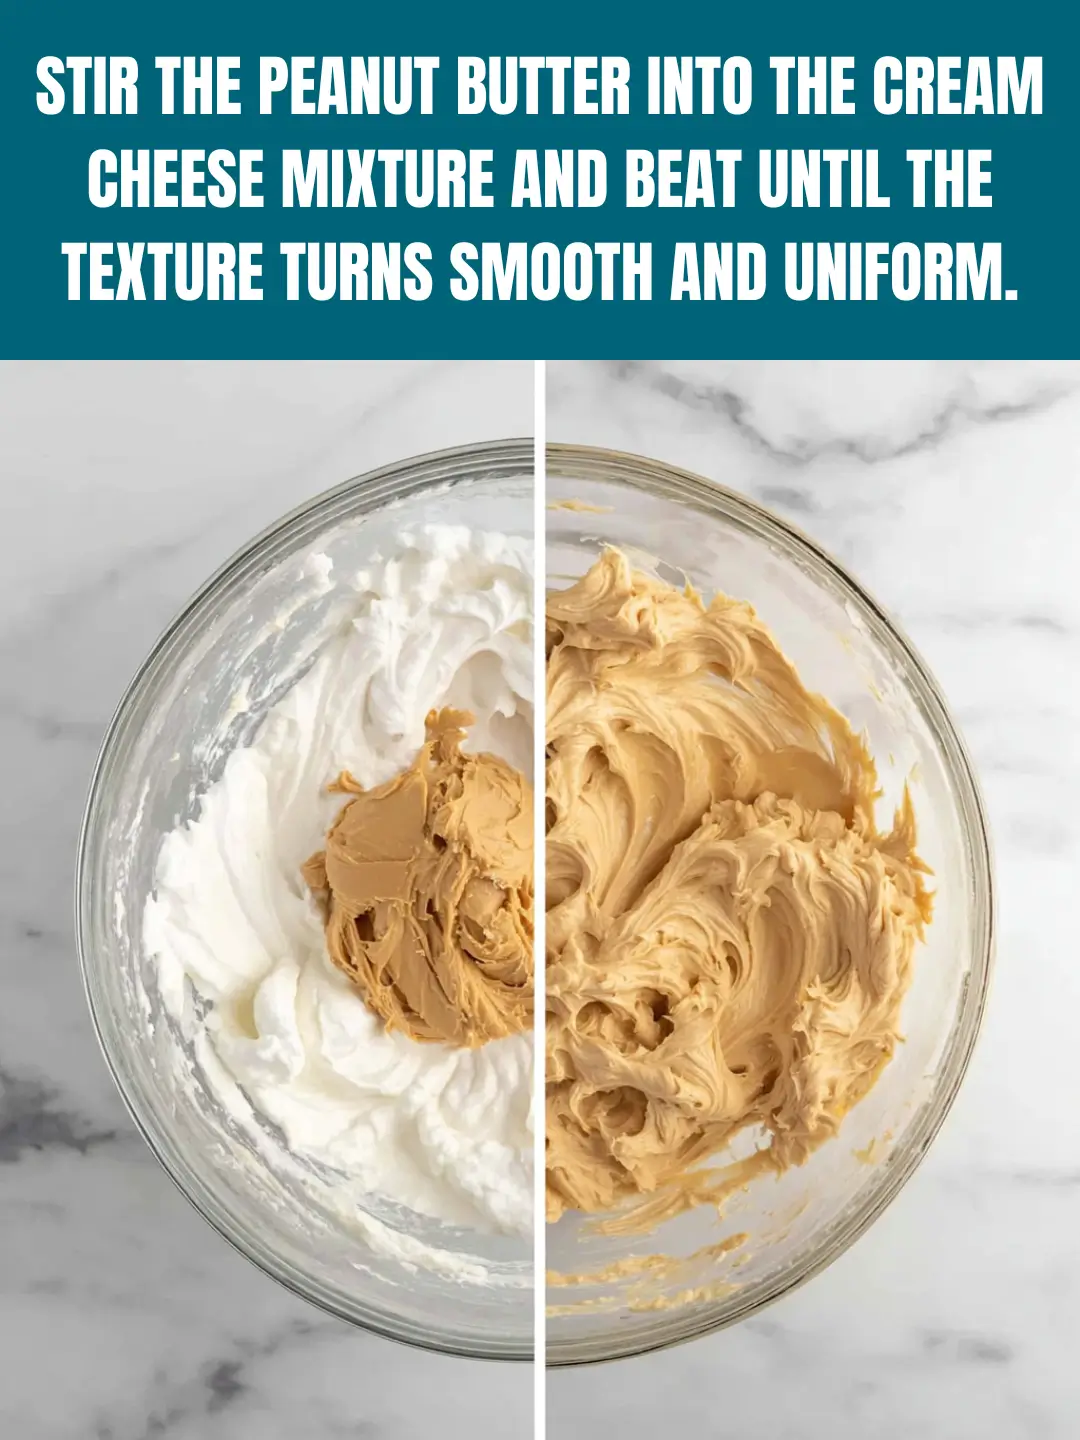
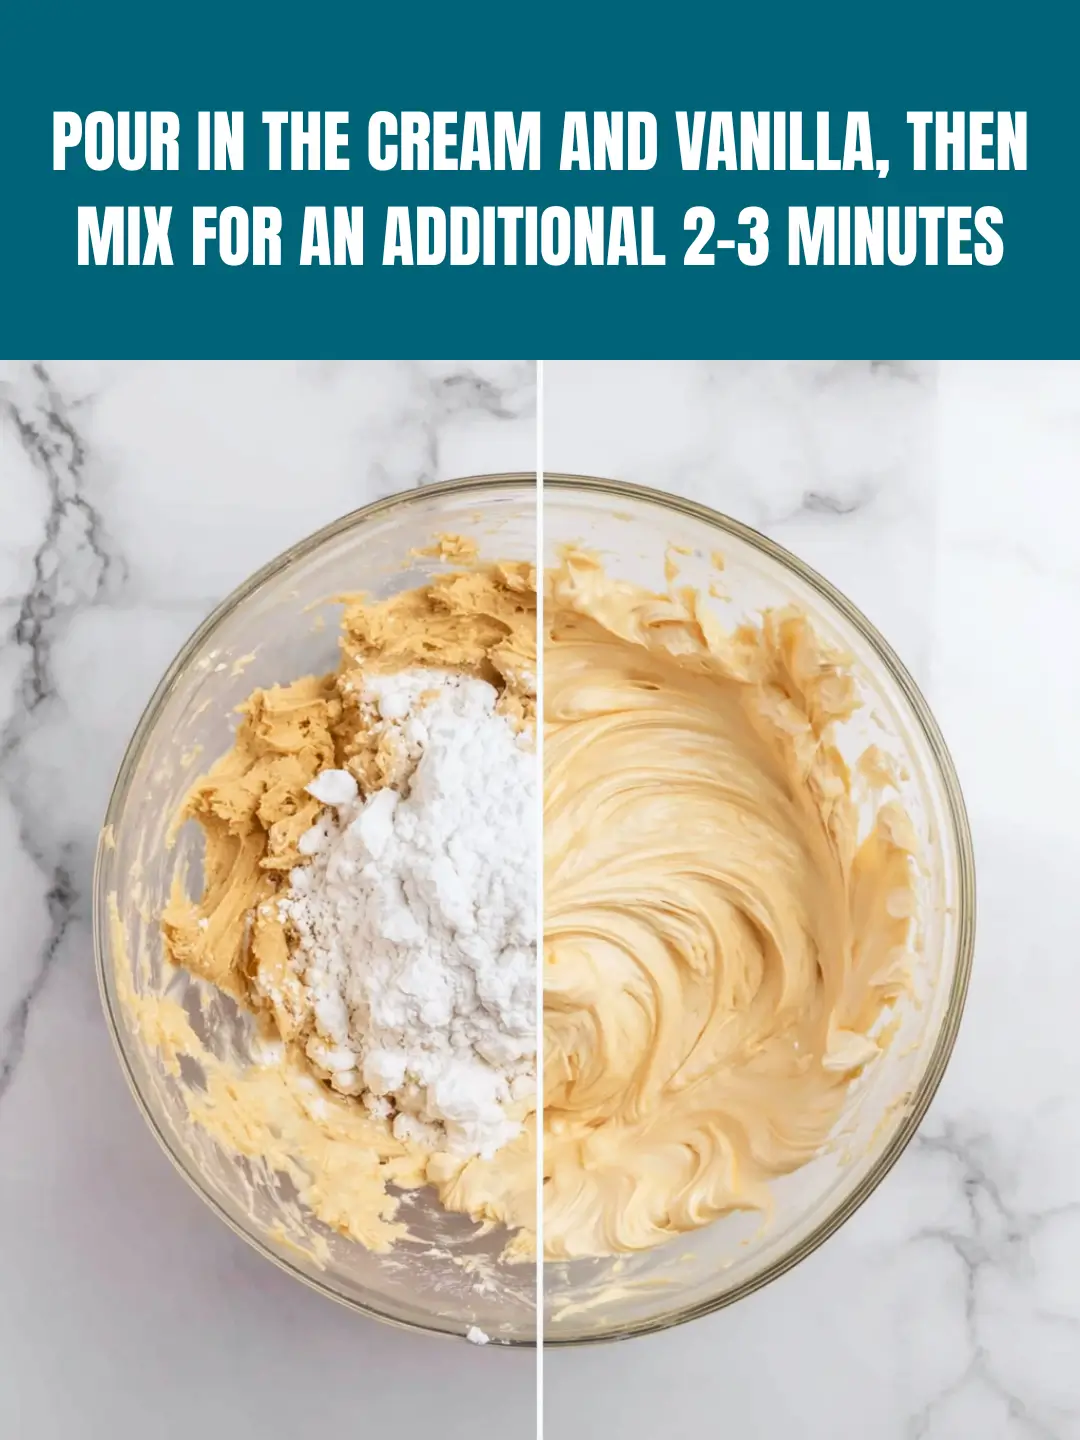
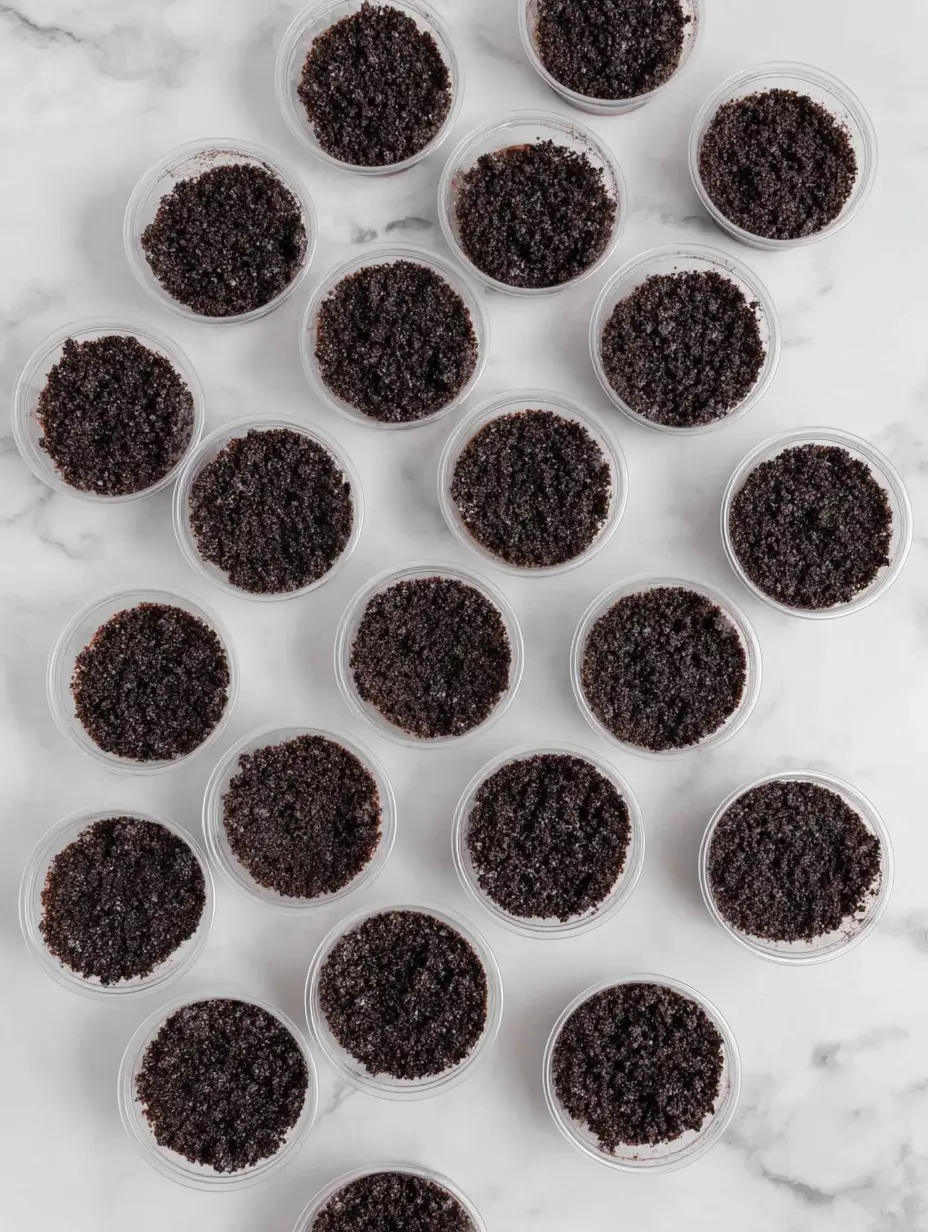
- Make the crust. Mix crushed Oreo cookies with melted butter until evenly coated. Add about 2 teaspoons to each dessert cup and press down firmly.
- Beat the filling base. In a large bowl, beat softened cream cheese and powdered sugar until smooth and creamy.
- Add peanut butter. Blend it into the cream cheese mixture until fully incorporated.
- Whip it up. Add cold heavy cream and vanilla extract. Beat for 2-3 minutes until thick, fluffy, and pipeable.
- Assemble the cups. Transfer filling to a piping bag or zip-top bag with the corner cut. Pipe over the cookie crust, filling each cup about ¾ full.
- Garnish. Drizzle with chocolate sauce and top with a Reese’s mini. Cover and chill until ready to serve.
Expert Tips for Chocolate Peanut Butter Dessert Cups
Use room temperature cream cheese. This ensures a smooth filling with no clumps. Let it sit out for 30-45 minutes before mixing.
Chill your heavy cream. Cold cream whips up faster and holds peaks better, which gives your filling a fluffy texture.
Press the crust firmly. Use the bottom of a glass or another cup to pack the crust tightly so it stays put when you spoon in the mousse.
Whip until thick. When adding the cream to the filling, don’t stop until it’s truly thick enough to hold shape it should resemble a mousse consistency.
Pipe for a clean finish. Use a piping bag for the filling to make each cup look neat and professional.
Chill before serving. Let the dessert cups chill for at least 2 hours to set the texture and enhance the flavor.
Add garnishes last. Drizzle chocolate and top with candies just before serving, especially if transporting them to avoid smudging or melting.
Chocolate Peanut Butter Dessert Cups Variations and Substitutions
- S’mores Style. Top each cup with mini marshmallows and a square of milk chocolate. Toast the marshmallows with a kitchen torch for a gooey twist.
- Nut-Free Swap. Use sunflower seed butter or cookie butter in place of peanut butter for those with nut allergies.
- Ganache Layer. Add a layer of chocolate ganache over the crust before piping in the mousse for a rich, silky surprise.
- Crunchy Pretzel Crust. Swap Oreos for crushed pretzels mixed with butter for a salty-sweet base.
- Gluten-Free Version. Use gluten-free chocolate sandwich cookies instead of Oreos.
- Holiday Toppers. Use seasonal candies (like mini eggs, peppermint bark, or Halloween sprinkles) to match the occasion.
- Chocolate Mousse Twist. Use Nutella instead of peanut butter for a creamy chocolate-hazelnut version.
- Fruit Fusion. Top with sliced bananas or a spoonful of raspberry preserves for a fresh balance.
- Jar Presentation. Layer everything into small mason jars instead of plastic cups for a cute, rustic dessert display.
Storing / Freezing Chocolate Peanut Butter Dessert Cups
Refrigerating instructions. Once assembled, cover the dessert cups tightly with lids or plastic wrap. They’ll keep well in the refrigerator for up to 4 days. In fact, they taste even better on day two as the layers have time to set and meld together. Keep them in a colder section of your fridge to help maintain their shape.
Freezing tips: These dessert cups freeze surprisingly well. For best results, skip the chocolate drizzle and candy garnish until after thawing. Place the cups on a tray to freeze individually, then store in a freezer-safe bag or container for up to 1 month.
Thawing before serving. Transfer frozen cups to the fridge at least 8 hours (or overnight) before serving. Once thawed, top with chocolate drizzle and peanut butter cups for the final touch.
Make-ahead party trick. If you’re preparing for an event, these are a dream dessert to make ahead and keep chilled in their serving cups. Add garnishes the day of serving to keep them looking bakery-fresh.
FAQs About Chocolate Peanut Butter Dessert Cups
Can I use Cool Whip instead of whipped cream?
Yes, you can! Swap in 8 oz of Cool Whip in place of the heavy cream for a quicker, more stable filling. The texture will be slightly more mousse-like and less fluffy but still delicious.
Do I need to bake the Oreo crust?
Nope! The butter and chilling step help the crust set up nicely without any baking required.
What size dessert cups work best?
I recommend using 3 to 4 oz cups. You can also use 2 oz mini shot cups for smaller servings or mason jars for a more elevated presentation.
Can I serve this as one large dessert instead of individual cups?
Absolutely. Press the crust into a 9-inch pie dish or trifle bowl and layer as usual. Chill and slice to serve.
More Healthy Goodies To Try
Before you get started! If you try this Chocolate Peanut Butter Dessert Cups recipe, I’d love for you to leave a rating and review. It helps us keep sharing free recipes you can count on.
No-Bake Chocolate Peanut Butter Dessert Cups
- Prep Time: 25 minutes
- Cook Time: 0 minutes
- Total Time: 25 minutes
- Yield: 14 dessert cup
- Category: Dessert
- Method: No-Bake
- Cuisine: American
- Diet: Gluten Free
Description
Creamy, no-bake chocolate peanut butter dessert cups layered with Oreo cookie crust, whipped peanut butter mousse, and a sweet candy topping. Perfect for parties, school lunches, or any peanut butter lover craving!
Ingredients
- 2 cups crushed Oreo cookie crumbs (with filling)
- 1/4 cup salted butter, melted and cooled
- 8 oz cream cheese, softened
- 1 cup powdered sugar
- 1 cup creamy peanut butter (like Reese’s or Jif)
- 1 1/2 cups cold heavy whipping cream
- 1 tsp pure vanilla extract
- Chocolate sauce, for drizzling
- 28 Reese’s peanut butter minis (2 per cup)
Instructions
- In a bowl, mix Oreo crumbs with melted butter until fully coated. Add 2 tsp to each dessert cup and press down to form a crust.
- In another bowl, beat cream cheese and powdered sugar until smooth.
- Add peanut butter and mix until creamy.
- Add cold heavy cream and vanilla. Beat 2–3 minutes until thick and fluffy.
- Transfer mousse to a piping bag. Pipe over cookie crust, filling each cup ¾ full.
- Drizzle with chocolate sauce and top with a Reese’s mini.
- Chill in the fridge at least 2 hours before serving.
Notes
- For best results, chill cream before whipping and use room temperature cream cheese.
- Make ahead up to 3 days in advance.
- For allergy-friendly swaps, use sunflower seed butter and GF cookies.
- Freeze undecorated cups for up to 1 month; thaw overnight and garnish before serving.
- Try topping with chopped nuts, crushed pretzels, or seasonal candy!
Nutrition
- Serving Size: 1 dessert cup
- Calories: 325 kcal
- Sugar: 21g
- Sodium: 160mg
- Fat: 23g
- Saturated Fat: 10g
- Unsaturated Fat: 11g
- Trans Fat: 0g
- Carbohydrates: 26g
- Fiber: 2g
- Protein: 5g
- Cholesterol: 40mg


